Pipelines are visual boards that let you track where a contact is in a specific journey. Each pipeline is made up of stages (columns), and each contact inside a pipeline is represented by a card called an opportunity. As a contact progresses, their card moves from one stage to the next, either automatically through workflows or manually by you.
Think of it like a kanban board. New leads start on the left, and as you make contact, book them in, and convert them, their card moves to the right. At a glance you can see exactly how many people are sitting in each stage and who needs attention.
Your pipelines
Every STRONG location comes with a set of default pipelines that are configured during account setup. Each one serves a different purpose.
| Pipeline | What it tracks |
|---|---|
| 00. Leads – Presale | Leads for locations that have not opened yet. Tracks presale interest from initial signup through to opening day conversion. Only relevant during a presale period. |
| 01. Leads | New enquiries from forms, Facebook lead ads, walk-ins, and other sources. This is where you manage your sales follow-up process. |
| 02. Intro Offer | Members who have purchased an intro offer. Tracks their journey from purchase through to first booking, first visit, and conversion to a full membership. |
Do not modify the default pipeline stages
The default stages in each pipeline are referenced by workflows and automations. Renaming, reordering, or deleting stages can break automated processes. If you need additional stages for your own tracking, you can add new ones, but leave the existing stages as they are.
Opportunities vs contacts
An opportunity is not the same thing as a contact. A contact is the person and their data. An opportunity is a specific instance of that person inside a pipeline. One contact can have multiple opportunities across different pipelines, or even multiple opportunities in the same pipeline over time.
For example, Sarah might have a lead opportunity in the Leads pipeline when she first enquires, and then an intro offer opportunity in the Intro Offer pipeline when she purchases. Both are linked to the same contact record.
Opportunity statuses
Every opportunity has a status that determines whether it shows up on your board:
- Open: the opportunity is active and visible on the board. This is the default.
- Won: the contact converted successfully. The card is hidden from the board by default to keep it clean.
- Lost: the contact did not convert. Also hidden from the board by default.
- Abandoned: the opportunity was left without a clear outcome. Hidden from the board.
By default, your pipeline only shows open opportunities. If you want to see everything including won and lost cards, use the Advanced Filters and remove the status filter. This is useful when you need to review historical data, but keeping the filter on during daily use prevents the board from getting cluttered.
The board view vs the table view
Pipelines can be displayed in two ways:
- Board view (cards): the default view. Each stage is a column and each opportunity is a card you can drag between stages. Best for daily pipeline management where you want a visual sense of where everyone sits.
- Table view: looks like a spreadsheet. Shows all opportunities in rows with sortable columns. Better for reviewing large volumes of data or when you need to see specific fields across all opportunities at once.
Working the pipeline
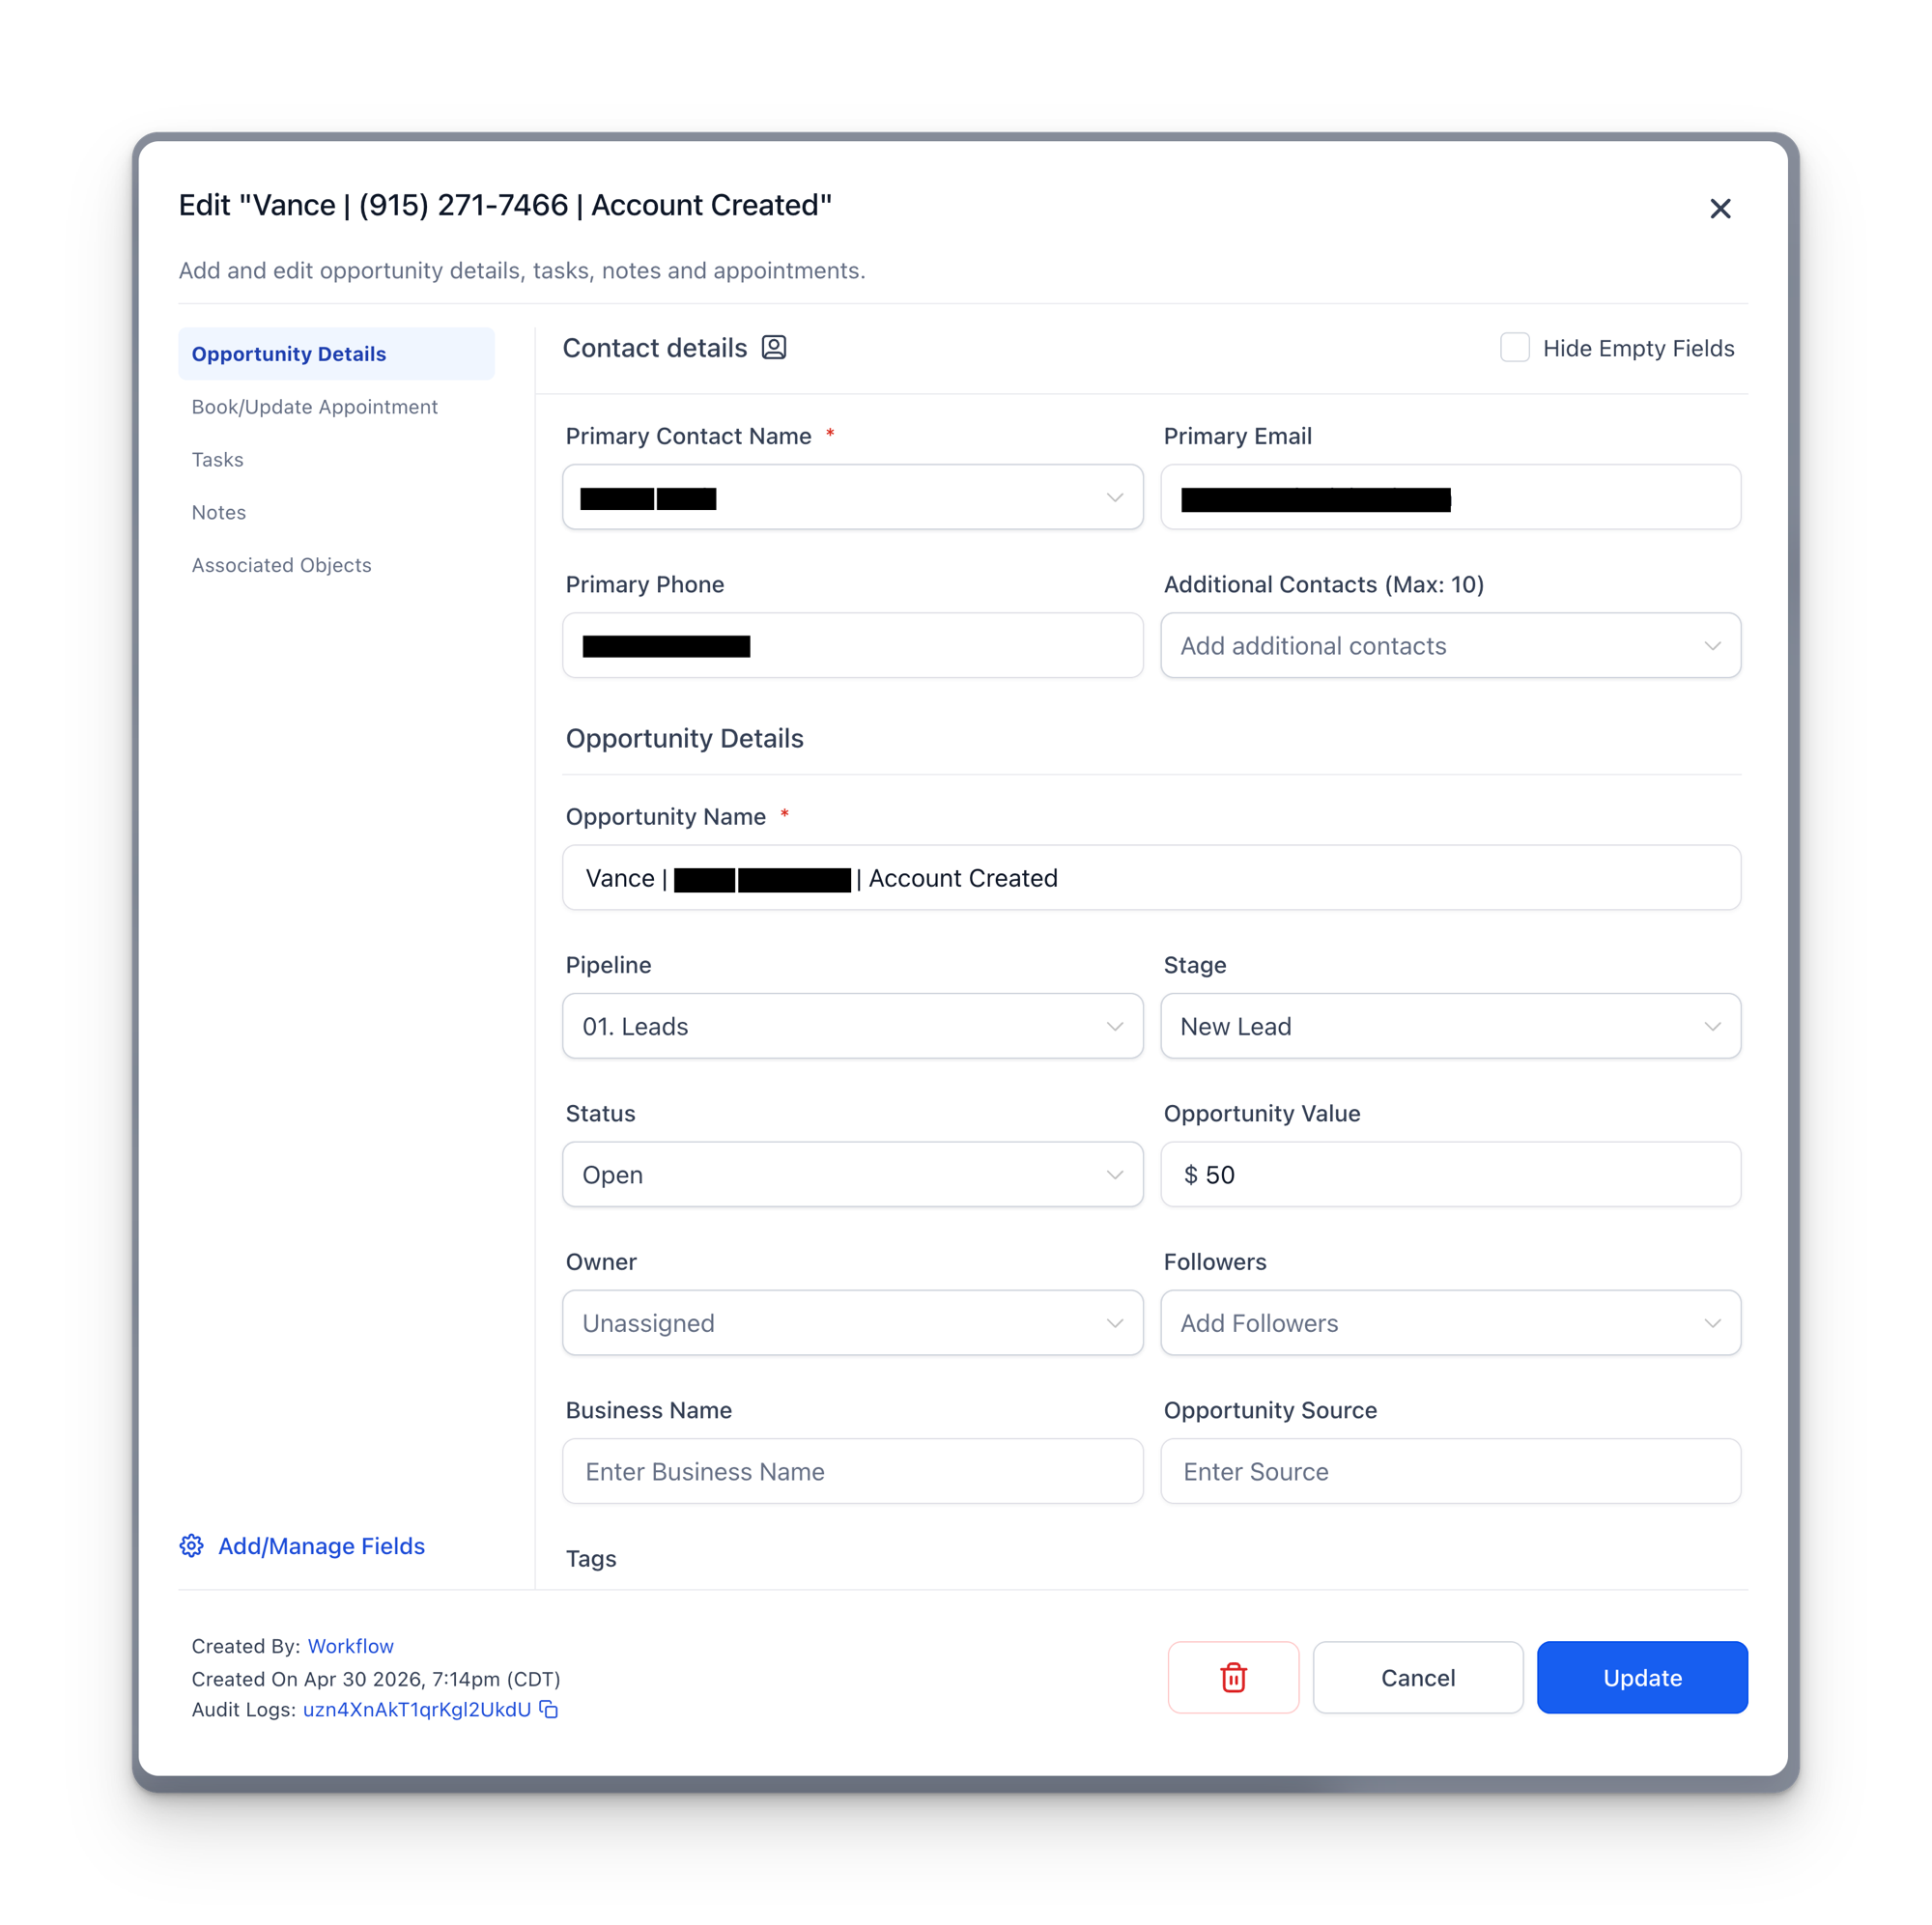
When you click on a contact card in the pipeline, you have two options depending on where you click:
- Click the opportunity name (the blue text) to open their full contact record. This shows their conversation history, all their contact details, and custom field data.
- Click the white space on the card to open the opportunity detail panel. This shows information specific to that opportunity, like notes, tags, and the stage selector.
Open contacts in a new tab
Hold Cmd (Mac) or Ctrl (PC) and click the contact name to open their full record in a new tab. This way you can review their conversation history while keeping the pipeline view open.
Moving contacts between stages
There are two ways to move a contact to a different stage:
- Drag and drop: click and drag the card from one column to another.
- Stage selector: click the white space on the card to open the detail panel, then change the stage from the dropdown.
Many stage changes happen automatically through workflows, but sometimes you will need to move cards manually. For example, after a phone call with a lead, you might move them from “New Lead” to “Call No Answer” or “Call Connected” depending on the outcome.
The calling process
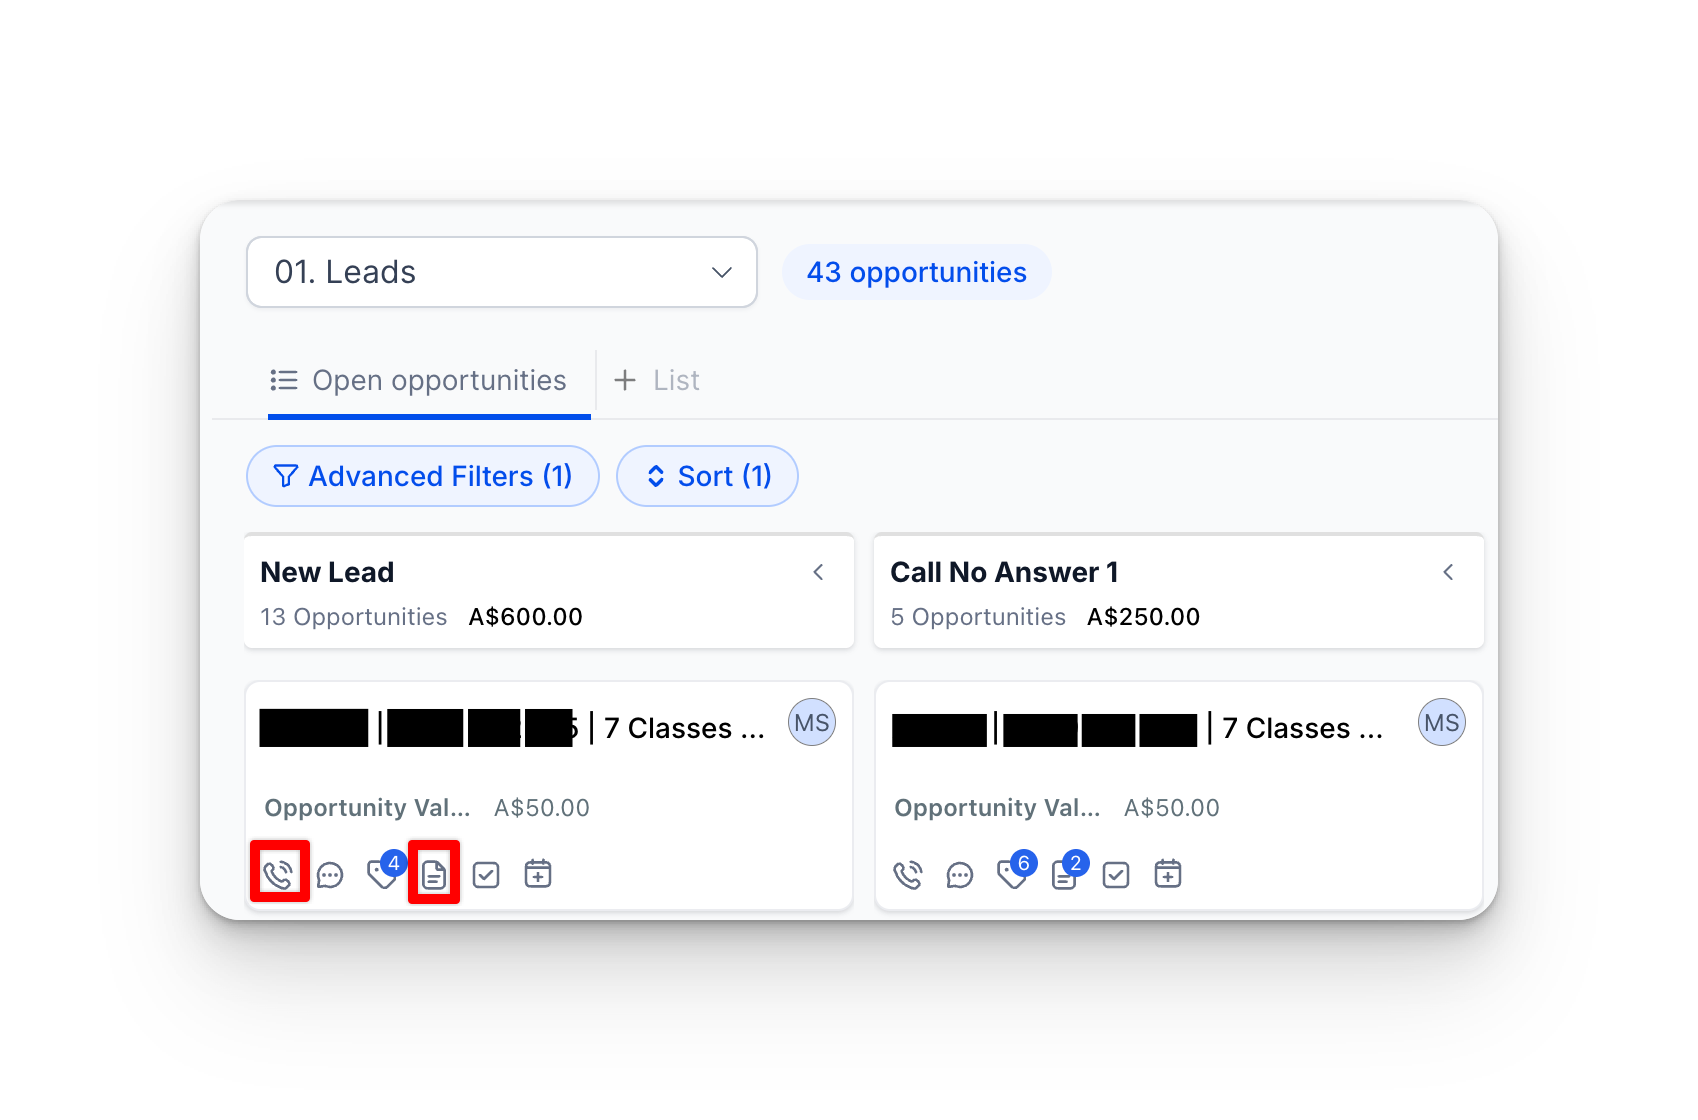
Each opportunity card has quick action buttons: call, notes, conversations, and tags. When you are working through your pipeline, the call and notes buttons work together. Here is the process to follow for every call.
Click the call button on the card
Put your headset on first. Click the call icon on the opportunity card and it will start ringing immediately.
Click the notes button while it is ringing
While the phone is ringing, click the notes button on the same card. This opens the notes panel so you are ready to type the moment the call connects.
Write your notes based on the outcome
If they pick up, take notes during the conversation. If they do not pick up, type “Called, no answer” and save the note. Either way, you have a record of the attempt.
Move the card to the correct stage
If they did not answer, manually drag the card to Call No Answer 1, then Call No Answer 2, then Call No Answer 3 on subsequent attempts. This has to be done manually because Grow cannot distinguish between a voicemail and an actual pickup.
Voicemail counts as a pickup
When a call connects to voicemail, Grow treats it the same as someone answering the phone. It starts counting the call duration from the moment the voicemail greeting plays. This means there is no way to automate the “no answer” stage movement. You need to move the card manually every time someone does not pick up.
The other quick action buttons on each card:
- Conversations button: opens the SMS and email history with that contact.
- Tags: shows which tags are applied to the contact.
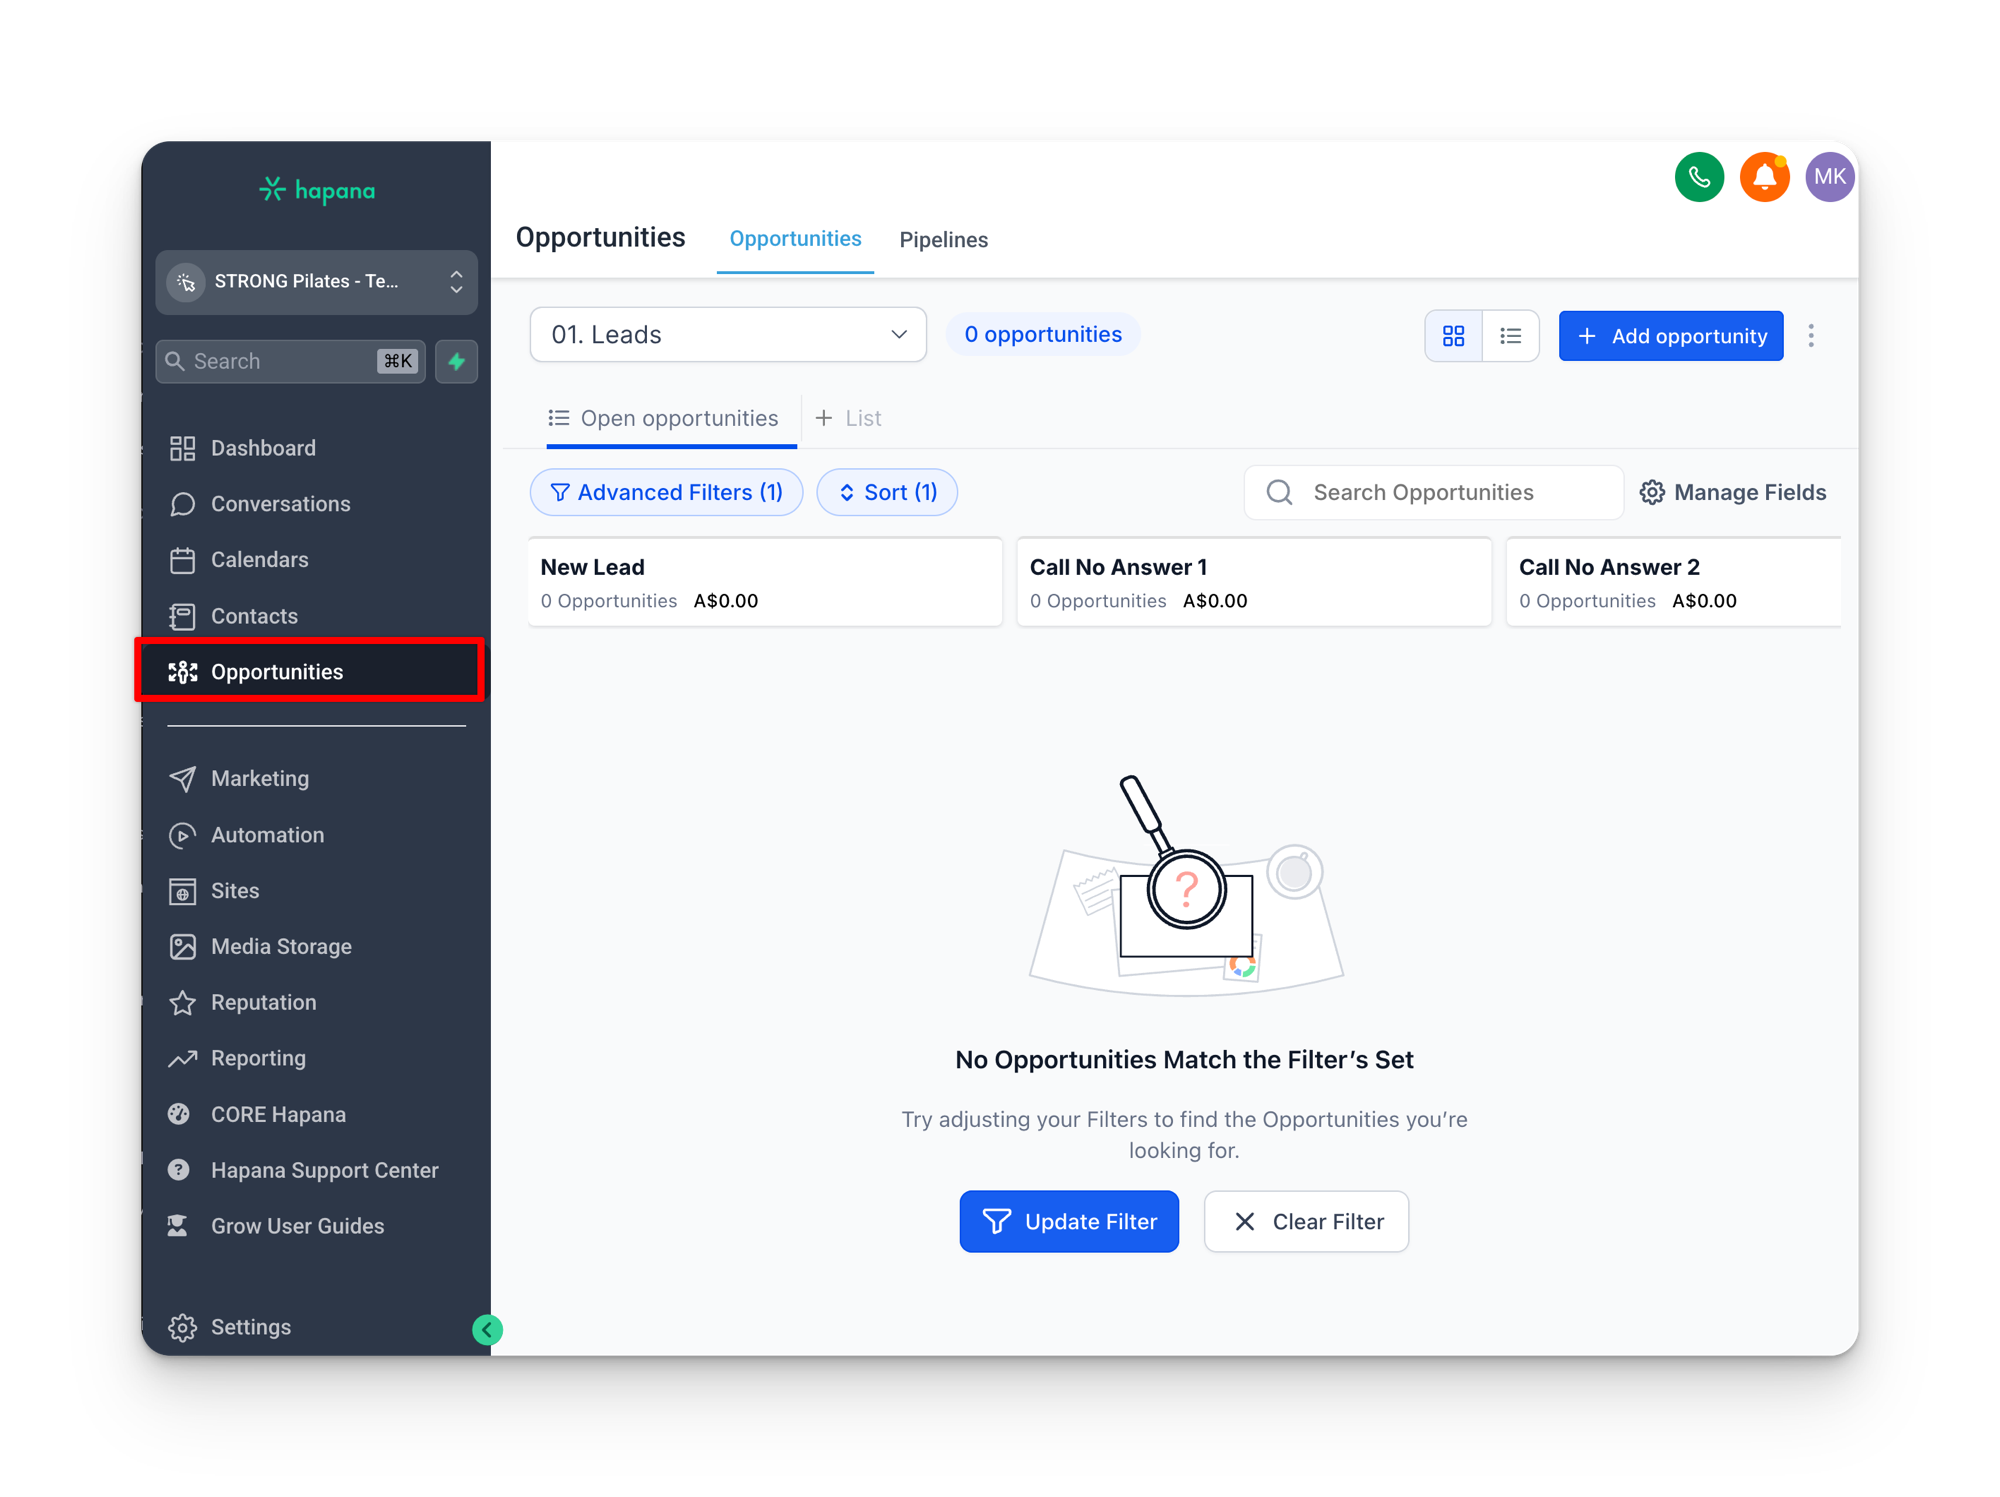
Adding opportunities manually
Most opportunities are created automatically by workflows when a lead submits a form, when the Core sync registers a new purchase, or when a contact meets certain criteria. But sometimes you need to add someone manually.
When to use the Add Opportunity button
- Walk-ins: someone walks through the door and wants to learn more. They are not in your database yet, so you create a new contact and add them as an opportunity at the same time.
- Missed captures: a lead came through a channel that does not automatically create a pipeline opportunity (for example, a general contact form or a direct message on social media).
- Manual re-entry: you want to add an existing contact back into a pipeline for follow-up, and no workflow trigger covers that scenario.
To add someone who is already in your database, click Add Opportunity, search for their name, and select them. To add someone entirely new, type their name and create a new contact record at the same time.
Managing your pipeline view
Card layout
You can customize what information appears on each card using Manage Fields. By default, cards show fields like opportunity source, opportunity value, and business name. If you prefer a cleaner look, you can remove fields and switch to a compact card layout.
Sorting
Opportunities within each stage can be sorted by Created On (when the opportunity was created) or Last Updated (most recent activity). Choose the sort order that matches how you work. Created On puts the oldest leads at the top, which can be helpful for making sure no one falls through the cracks.
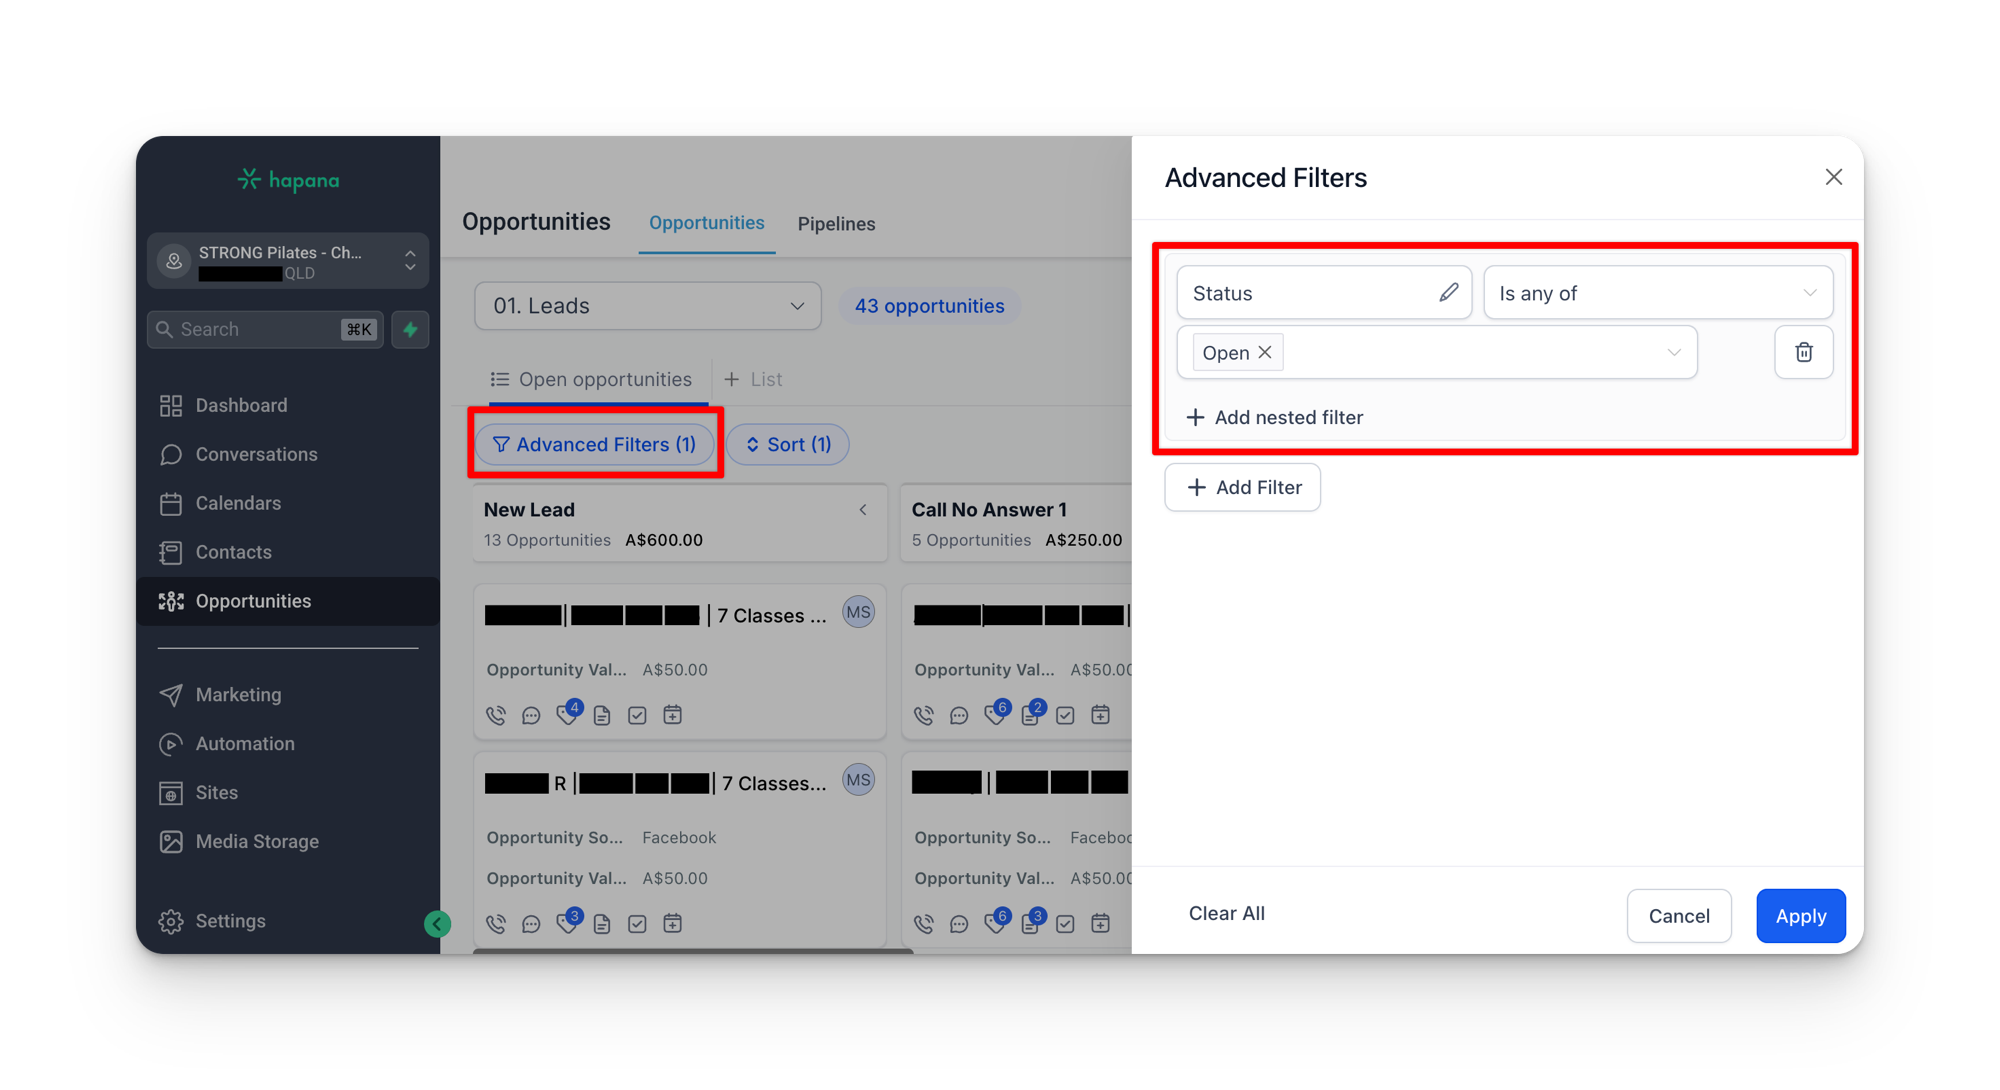
If your pipeline suddenly shows hundreds of contacts
Sometimes filters get accidentally cleared. When that happens, the pipeline will show every opportunity ever created, including won, lost, and abandoned cards. It can look overwhelming, but it is easy to fix.
Click Advanced Filters at the top of the pipeline. Set the Status filter to Open and click Apply. This hides all the closed opportunities and returns the board to showing only the contacts you are actively working.
The Pipelines tab
In the top navigation of the Opportunities page, you will see a Pipelines tab alongside the main Opportunities tab. This is where you can view and edit the pipeline structure itself, including adding new stages. The Bulk Actions tab shows historical data for any bulk operations performed on opportunities.
Pipeline stages are tied to workflows
Before adding, renaming, or removing any pipeline stage, check whether any workflows reference that stage. Workflow actions like “Move to stage” and workflow triggers like “Stage changed to” rely on exact stage names. Breaking that connection means contacts stop moving through the pipeline automatically.
Visit count timing
In the Intro Offer pipeline, each card shows a visit count that tells you how many sessions a contact has attended. There are actually two places this number appears, and they update at different times.
| Where | What it shows | When it updates |
|---|---|---|
| Pipeline card | Visit count displayed on the card in the board view | Once per day at 12:15 AM (your local time zone) |
| Intro Offer Pipeline Visits (contact profile) | The custom field under Intro Offer Information on the contact record | In real time |
If a member attends a class at 9 AM, the pipeline card will still show yesterday's visit count until the overnight update runs. But if you Cmd+click the card to open the full contact profile and scroll to the Intro Offer Pipeline Visits field, you will see the updated number immediately.
When the numbers do not match
If a member says they attended today but the pipeline card still shows the old count, check the contact profile field instead. The card will catch up after midnight. This is not a bug, it is how the system processes the overnight sync from Core.
How contacts leave the pipeline
Contacts do not stay in the pipeline forever. There are a few ways a card gets removed from the board.
- Workflow conversion: when a lead purchases an intro offer, the workflow marks their leads pipeline opportunity as Won and creates a new opportunity in the Intro Offer pipeline.
- Manual removal: you can change the opportunity status to Won, Lost, or Abandoned to remove a card from the active board view.
- 28-day auto-cleanup: if a lead sits in the Leads pipeline for 28 days without purchasing an intro offer, the system automatically removes their card from the pipeline. The contact stays in the database and will still receive any mass marketing campaigns you send. They just no longer appear on the pipeline board.
Removed does not mean deleted
When a contact is removed from the pipeline, either automatically or manually, their contact record stays in the database. You can still find them in Contacts, they still appear in Smart Lists if they match the criteria, and they will still receive any bulk emails or SMS campaigns you send. The pipeline is a working view, not the database itself.